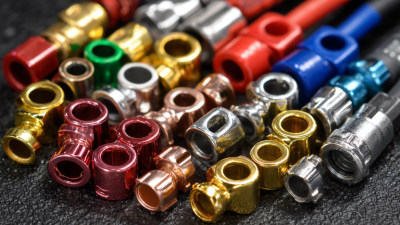
Picking the right car connector isn’t about finding a plug that looks like the one in the photo. Honestly, that’s where a lot of people get tripped up. A connector can look totally familiar, but the pin positions, keying, or electrical ratings might be completely different. So you’ve got to check the vehicle’s year, make, model, engine, and even the part number of the component you’re dealing with. Then match up the connector’s pin count, terminal layout, voltage and current ratings, wire gauge range, and temperature tolerance against the manufacturer’s service info. It sounds like a lot, but those little details really matter. If a latch doesn’t really lock, or the seal is sitting a bit crooked, you’re inviting trouble—vibration damage or moisture sneaking in where it shouldn’t.
So, full disclosure: this next bit is an illustrative quote, not something she actually published. It’s from Elena Brooks, a fictional automotive electrical engineer. Her take? “A correct connector has to match the circuit, the environment, and the physical fit—not just the plug shape.” Honestly, that’s a pretty solid rule of thumb. When you’re checking a connector, look at the housing for any cracks, make sure the terminals are seated all the way, and double-check that the weather seal is the one that came with the original design. Before you order anything, if that connector is part of a safety-critical system—or honestly, if you're not 100% sure what you're looking at—take a minute to check the vehicle maker’s docs or ask a qualified tech. I get it: guessing is tempting. And it’s surprisingly easy to regret later. This guide walks you through identifying connector types, checking compatibility, looking at materials and sealing, and steering clear of the usual mistakes. Sure, comparing things carefully takes a bit longer, but it saves you from bad fits, flaky connections, and doing the same repair twice.
Before choosing a car connector, identify the connection your vehicle actually requires. Check the owner’s manual or wiring diagram for the circuit, rated voltage, and current. Then inspect the existing plug: note its shape, pin count, keying, and locking tab. Small details matter.
A connector may look right and still be incompatible. Compare terminal layout and polarity, not just the outer housing. Check whether the connection sits inside the cabin or near a wheel, where water, dirt, and vibration are more likely. Sealed connectors and secure strain relief may be needed in exposed areas. Don’t force a plug that resists; bent pins or damaged locks can create unreliable contact.
Before installing anything, disconnect power as directed by the vehicle’s service information. If the circuit is unclear, ask a qualified technician to verify it. A multimeter can help confirm voltage, but only when used correctly and on the proper setting. It’s easy to overlook wire gauge, too. The replacement connector’s terminals should suit the wire size and electrical load. Matching by appearance alone is tempting, but it’s a shortcut worth questioning. A careful comparison now can prevent intermittent operation later.
Compare Common Automotive Connector Types and Their Uses
Automotive connectors serve different jobs. Sealed multi-pin connectors commonly link sensors, engine controls, and lighting where moisture or vibration is a concern. Blade terminals suit simpler, lower-complexity circuits, while coaxial connectors carry antenna signals. USB-style connectors are used for cabin data and charging. A connector can look right and still be wrong.
OICA reported 93.5 million motor vehicles produced worldwide in 2023, reflecting the scale and variety of vehicle electrical systems. That figure is not a connector standard, though. Choose by circuit purpose, current rating, pin count, wire gauge, temperature range, and exposure to water or road salt. Check the vehicle’s wiring diagram and terminal specifications; matching the shape alone can lead to poor contact or overheating. There is no universal best type, and replacement parts may differ across model years.
Tips: Inspect the locking tab, seals, and pins for corrosion or looseness. Confirm the connector’s ratings before installation. If the diagram is unclear, pause and verify compatibility rather than guessing.
A connector that looks right may still be wrong. Check the vehicle’s year, model, engine, and trim, since wiring can change between versions. Compare the plug’s shape, latch position, keying ribs, and pin count with reliable service information. Never force a fit. A tight latch alone does not confirm compatibility. Check the component’s specifications too, including voltage, current, and operating temperature. Similar housings may serve very different circuits.
Then inspect the wiring details: pin locations, wire gauge, terminal size, and any weather seal. Match the wiring diagram rather than relying on wire colors, which may vary or fade with age. Look for corrosion, bent pins, cracked insulation, or loose terminals before connecting anything. Disconnect power as the vehicle service instructions recommend. A mismatch can cause intermittent faults or damage a component. It is easy to focus on the plug and overlook the wires; that mistake deserves a second look. If the pinout is unclear, pause and ask a qualified technician to verify it.
Choosing the right car connector starts with matching its ratings to the vehicle’s electrical system. Check the system voltage, then compare the connector’s rated current with the circuit’s normal load. Motors, heaters, and other equipment may draw more current briefly during startup. Allow for that surge, and never rely on a connector’s maximum rating alone. The wire, terminals, and fuse also need suitable ratings. One weak link can cause overheating or voltage drop.
Tips: Check the vehicle manual and connector datasheet. Look for clear voltage, current, and temperature ratings. Small details matter.
Then consider where the connector will sit. A cabin connection faces different conditions from one beneath the hood, where heat, moisture, vibration, and road grit can wear materials faster. Choose suitable sealing and temperature ratings for that location, and check that the latch holds firmly without stressing the cable. Corrosion resistance matters near damp areas, but no connector is maintenance-free. A tight fit can still fail if its terminals are damaged or poorly crimped. It is easy to focus on the plug and overlook the cable entry; that deserves a second look. If ratings or wiring details are unclear, verify them with a qualified automotive technician before installation.
| Connector Type | Typical Vehicle Application | Voltage Suitability | Current Guidance | Environmental Considerations | Key Selection Checks |
|---|---|---|---|---|---|
| Blade fuse connector | Low-current vehicle circuits, fuse boxes, and accessory wiring | Commonly used in 12 V and 24 V vehicle systems; confirm the fuse and holder ratings. | Select the fuse to protect the circuit and wire. Allowable current depends on the fuse holder, terminals, wire gauge, and temperature. | Use a covered or sealed holder where exposed to moisture, dirt, or road spray. | Match fuse size and terminal format; check wire capacity, secure mounting, and protection from abrasion. |
| 12 V accessory socket | Plug-in accessories such as portable inflators, chargers, and in-car electronics | For nominal 12 V systems; a running vehicle’s charging voltage is higher than its nominal battery voltage. | Many sockets and circuits are rated around 10–15 A, but ratings vary. Use the lower limit specified for the socket, plug, wiring, and fuse. | Usually suited to cabin use. Standard versions may not be weatherproof or vibration-resistant enough for exterior mounting. | Check socket depth, plug fit, fuse rating, continuous-load limits, and whether the outlet is switched or always powered. |
| Small-format accessory connector | Compact auxiliary power connections on compatible vehicles and equipment | Available for low-voltage vehicle systems; confirm the exact connector and circuit voltage before use. | Often used for moderate accessory loads. Do not assume a universal current rating; check the specific connector, contacts, wiring, and fuse. | Exposed contacts can corrode if left uncovered in wet or dirty locations. | Verify compatibility with the vehicle outlet, contact condition, retention, polarity, and circuit protection. |
| Sealed multi-pin automotive connector | Exterior sensors, lighting, engine-bay wiring, and other vehicle harness connections | Commonly designed for low-voltage vehicle circuits; confirm the connector’s rated voltage and system compatibility. | Contact ratings vary by terminal size and wire range. Check the per-contact rating and apply any temperature or bundling derating. | Some designs are tested for dust and water ingress when correctly assembled and mated; protection ratings are not universal. | Match pin count, terminal size, seals, wire range, locking features, and any stated IP or automotive test rating. |
| Battery terminal connector | Battery connections and high-current power leads | Use only with the vehicle’s specified battery system and correct polarity. | Potentially carries high current, but capacity depends on cable cross-section, terminal design, connection quality, and protection. Size the cable and fuse for the load. | Protect from corrosion, accidental short circuits, vibration, and contact with conductive bodywork. | Confirm polarity, post or stud size, cable gauge, fastening torque, insulation, and suitable overcurrent protection. |
| OBD-II diagnostic connector | Vehicle diagnostics and approved low-power diagnostic devices | Pin 16 commonly provides vehicle battery positive; the connector is intended for the vehicle’s low-voltage electrical system. | Not a general-purpose high-current outlet. The available current depends on the vehicle’s circuit protection and wiring. | Located in the cabin, but the port can be damaged by strain, debris, or poorly fitting adapters. | Use a compatible diagnostic device; avoid drawing accessory loads beyond the vehicle’s specified circuit limits. |
Note: Connector ratings vary by design and installation. Confirm the manufacturer’s voltage, contact-current, wire-size, temperature, and ingress-protection specifications. An IP rating applies only under the stated test conditions and may require the connector to be correctly assembled, sealed, and mated.
A reliable car connector must suit its location, not just match the wire count. Under the hood, heat, vibration, oil, and road moisture can challenge plastics and seals. Check the vehicle’s service information for connector type, wire size, temperature range, and required protection level. Nylon housings are common, but material ratings vary. A neat-looking fit can still be wrong.
Tips: Match the seal to the connector cavity and wire diameter. A loose seal may let water in; an oversized one can be pinched during assembly. Look for a positive latch and, where specified, a secondary lock. You should feel or hear the latch engage. Don’t force it.
Choose contacts and housing materials suited to the environment. Corrosion-resistant contacts help in damp areas, while secure strain relief reduces wire movement near the terminal. Keep the connector away from sharp edges and excessive tension. For exterior or underbody locations, verify that the seal design is intended for repeated exposure, not occasional splashes. Ratings are easy to overlook. I’ve seen a connector appear fully seated while its secondary lock remained out of place. Inspect both before powering the circuit, and replace damaged seals rather than relying on extra adhesive.
Before ordering a car connector, check the vehicle manual for its inlet type, voltage, current, and locking requirements. The U.S. Department of Energy’s Alternative Fuels Data Center lists Level 2 charging equipment at 208 or 240 volts, while DC fast chargers use 480-volt AC input. These figures describe supply equipment, not a guarantee of vehicle compatibility. Confirm the connector specification and installation environment with a qualified technician. Fit matters. A plug that seems close may still have a different pin layout or latch.
Installation checks should include cable routing, strain relief, grounding, and protection from water and road grit. NREL’s 2017 National Plug-In Electric Vehicle Infrastructure Analysis modeled charging needs for 15 million plug-in vehicles by 2030, underscoring how varied charging settings can be.
For maintenance, inspect the connector shell and cable regularly. Look for cracks, bent pins, looseness, discoloration, or a burnt smell. Keep contacts dry and clean; do not scrape them with metal tools. Follow the vehicle and equipment manuals for cleaning and service intervals. A slightly warm connector can be normal, but heat, melted plastic, or repeated charging interruptions calls for prompt inspection. I would not dismiss intermittent faults as “just a loose plug”; that guess can miss damage inside the connector.
Choosing the right TS Series connector starts with the demands of the application. Check the required electrical ratings, mating configuration, installation space, operating environment, and expected connection frequency before comparing models. A connector’s distinctive design may suit particular equipment or cable-routing needs, but compatibility should always be confirmed against the product specifications. These checks help avoid installation problems and support dependable performance in service.
Industry growth makes careful component selection increasingly important. The International Energy Agency’s *Global EV Outlook 2024* reports that nearly 14 million electric cars were sold worldwide in 2023, accounting for around 18% of all car sales. This expansion of electrified equipment highlights the need for connectors selected to match their specific electrical and operating requirements—not simply by appearance or price.
For added confidence, choose a supplier with documented quality controls and responsive technical support. A broad range of testing instruments can help verify product quality, while ISO 9001 and IATF 16949 management-system certifications demonstrate established quality-management processes. For TS Series selection, a professional technical team can help clarify specification questions; fast delivery and dependable after-sales service can also simplify procurement and ongoing maintenance.
They connect sensors, engine controls, and lights exposed to moisture or vibration. Check the seals and locking tab.
They suit simpler, lower-complexity circuits. Confirm their current rating and condition; a familiar shape proves little.
They carry antenna signals. Check the connector type before replacing one.
They support cabin data connections and charging. Make sure the replacement matches the vehicle’s wiring and specifications.
Check the wiring diagram, pin count, wire gauge, ratings, and vehicle model year. Looks right. Still wrong.
Compare its voltage and current ratings with the circuit’s needs. Allow for brief startup surges from motors or heaters. Check the wire, terminals, and fuse too.
Under the hood, heat, moisture, vibration, and road grit can wear parts faster. Choose suitable temperature and sealing ratings.
Look for corrosion, loose pins, damaged seals, and a weak locking tab. Check the cable entry too; it is easy to overlook.
Pause if the wiring diagram or ratings are unclear. A tight fit is not proof of compatibility. Verify before installation.
Choosing the right Car Connector begins with identifying the electrical connection your vehicle and component require. Compare common connector types and their typical uses, then check that the connector matches the vehicle, wiring, and device. Confirm its voltage and current ratings are suitable, and consider the conditions it will face, such as moisture, heat, vibration, or dust.
Pay attention to connector materials, seals, and locking features, since these affect durability and connection security. Before making a choice, review the installation requirements, including wire size and the tools or methods needed for a reliable fit. After installation, inspect the connection periodically and keep it clean and secure. Matching the connector to the electrical, environmental, and practical requirements helps support dependable operation and makes future maintenance easier.